Supabase and Nuxt
What is supabase
Supabase is an open-source Backend-as-a-Service (BaaS) platform designed to help developers build, scale, and manage applications with ease. It provides a suite of tools and services that streamline the process of setting up and maintaining a backend infrastructure, enabling developers to focus on building great products without the hassle of managing servers and databases.
Why choose supabase?
- Open-Source: Being open-source, Supabase ensures transparency, flexibility, and community contributions. Developers can customize and extend the platform according to their needs.
- Developer-Friendly: Supabase is designed with developers in mind, offering easy-to-use SDKs, comprehensive documentation, and a supportive community.
- Scalable and Reliable: Built on PostgreSQL and other robust technologies, Supabase can handle applications of all sizes, from small projects to large-scale enterprises.
- Cost-Effective: Supabase offers a generous free tier and competitive pricing plans, making it an affordable choice for startups and established businesses alike.
Getting Started
Supabase setup
1. Setup your supabase account:
- Sign-up to create your supabase account or login
- Once signed-in you will be directed to the dashboard
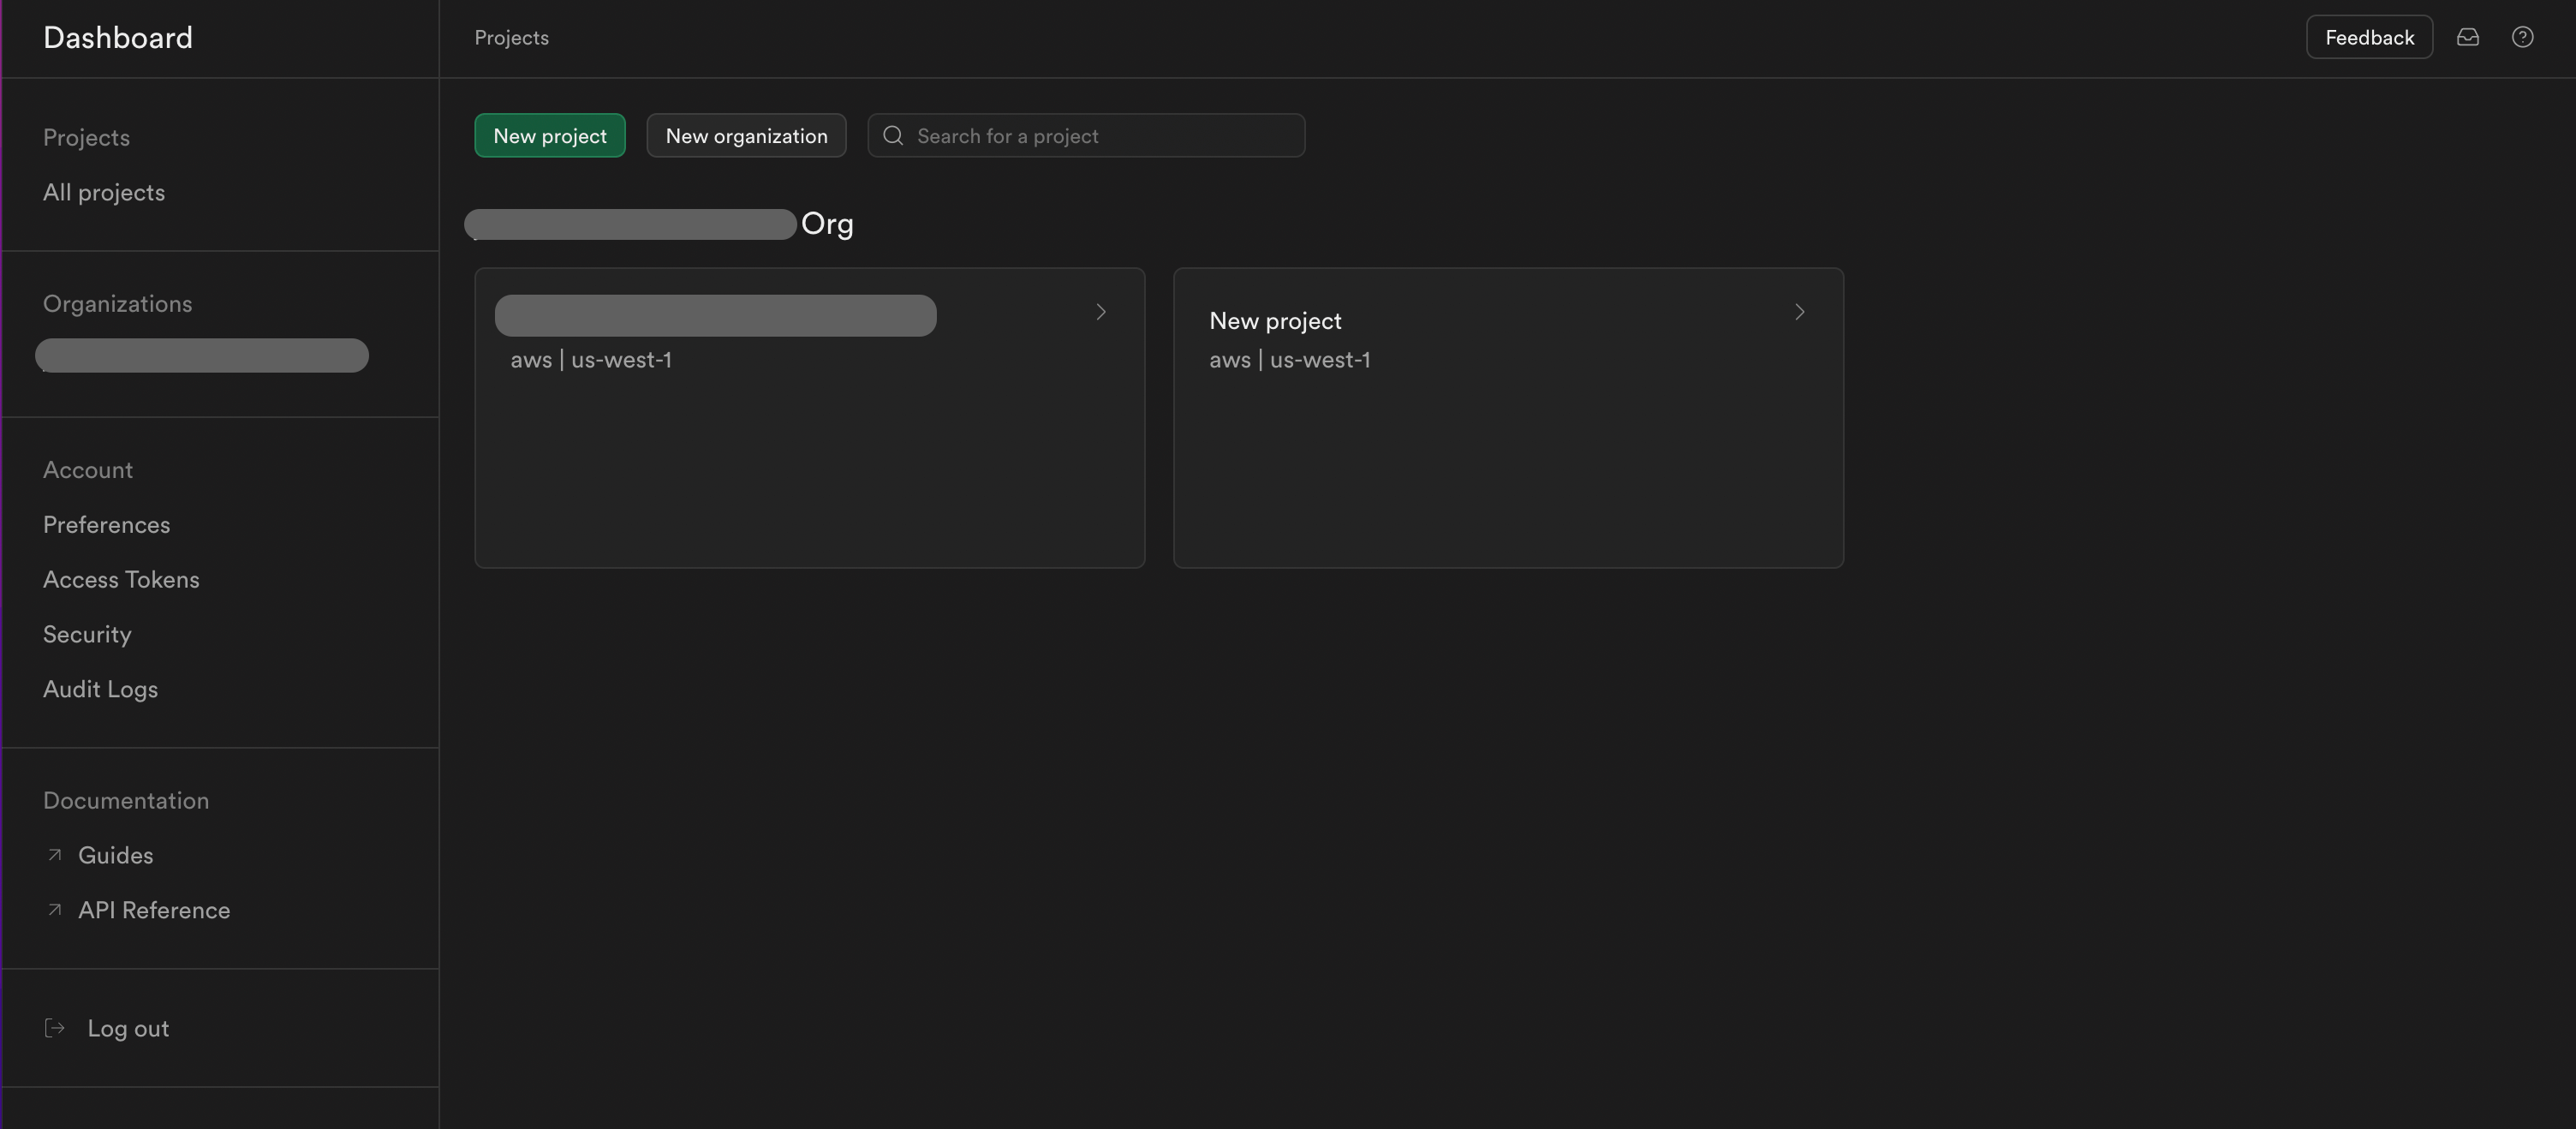
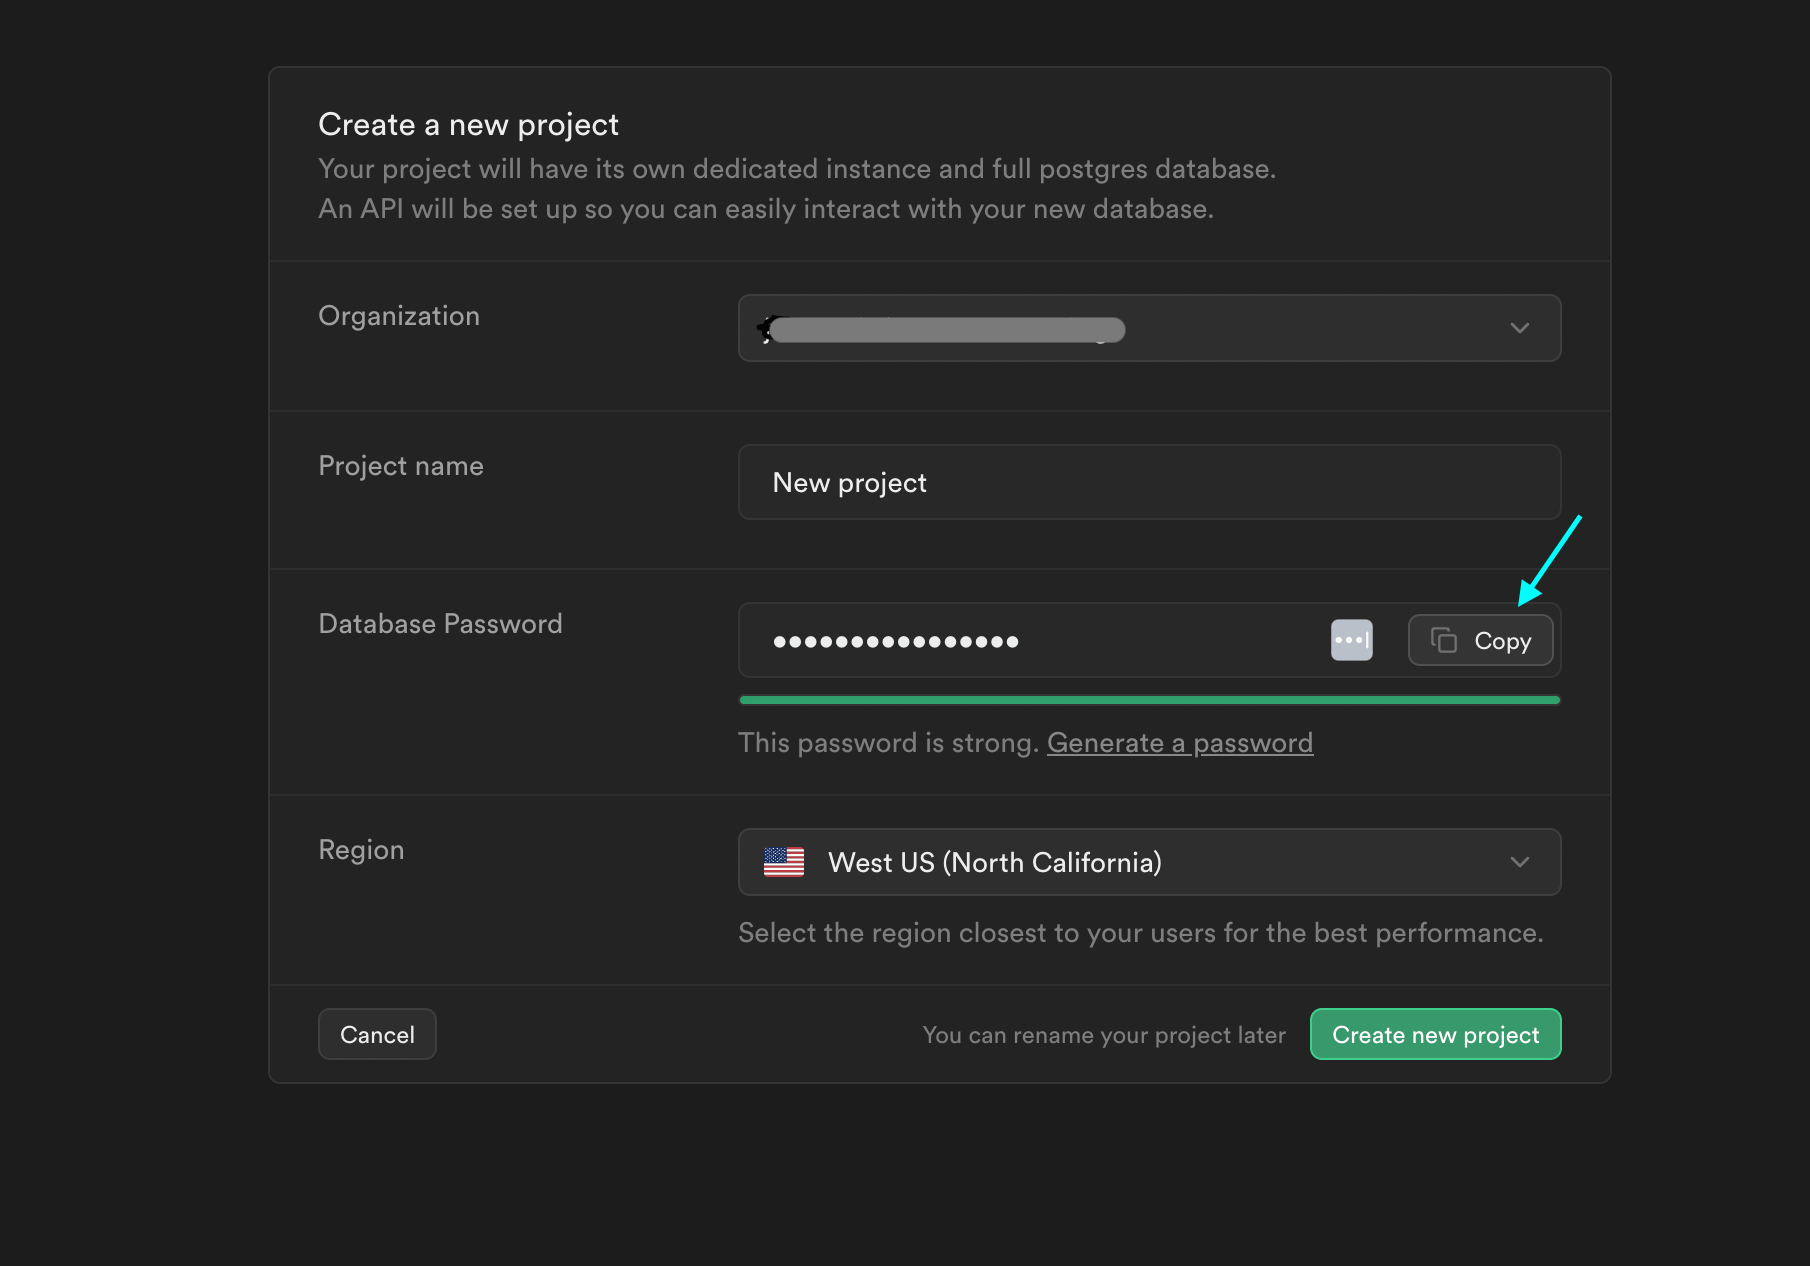
2. Create a new project
- Click on the "Create new project" button
- Fill out the form fields
- Important: Generate a strong password, copy and save for later
- Select a region closest to your location
- Select the free pricing plan
- Click "Create new project"
3. Copy & save your project URL and API key
- Once your project is created by supabase you will be directed to your project page.
- In the sidebar go to "Project Settings"
- Under configuration click on API
- Copy and save the Project URL and Project API key (public)
- Note: The public project API key is safe to use to use in the browser if RLS (Row Level Security) is enabled

Nuxt setup
1. In the terminal of your nuxt app
npm install @nuxtjs/supabase --save-dev
2. Add @nuxtjs/supabase to the modules in nuxt.config
export default defineNuxtConfig({
  modules: ['@nuxtjs/supabase'],
})
3. Add supabase secrets to .env
- Create a .env file in the root of your Nuxt project
- Add the project URL and API key
.env
SUPABASE_URL="https://example.supabase.co"
SUPABASE_KEY=Project_API_Key
4. Disable Supabase Redirect Until Login is Configured:
In nuxt.config.js, disable Supabase redirect:
export default defineNuxtConfig({ supabase: { redirect: false } })
Create table in supabase
1. In supabase click on "Table Editor"
- Click "Create new table"
- Setup the new table
- For now disable RLS security
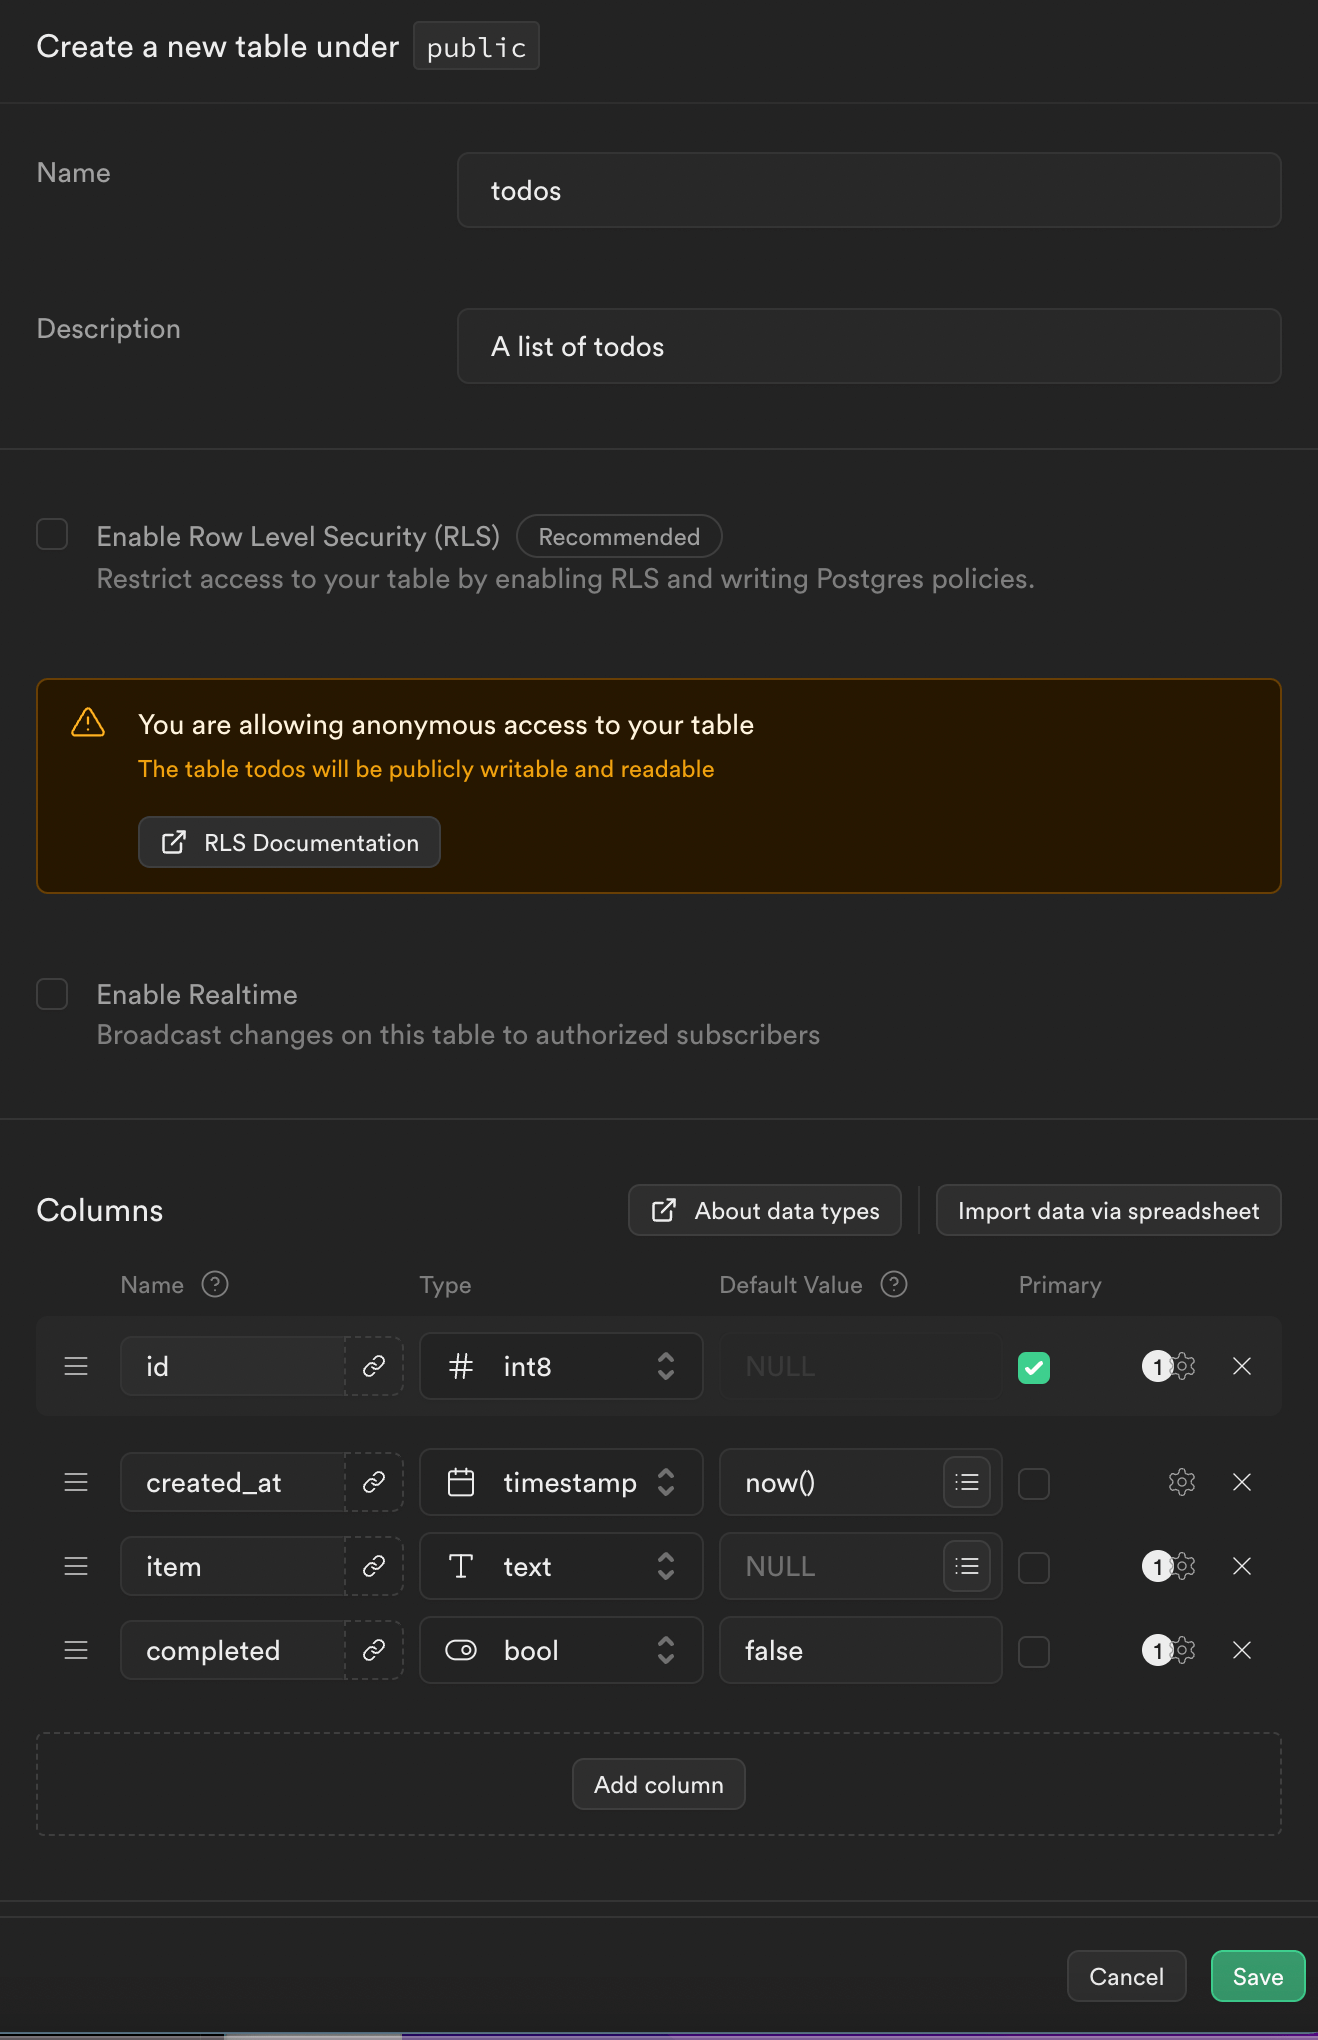
2. Configure and columns
- Keep it simple: keep your primary key the default id
- Name: Unique name for each column
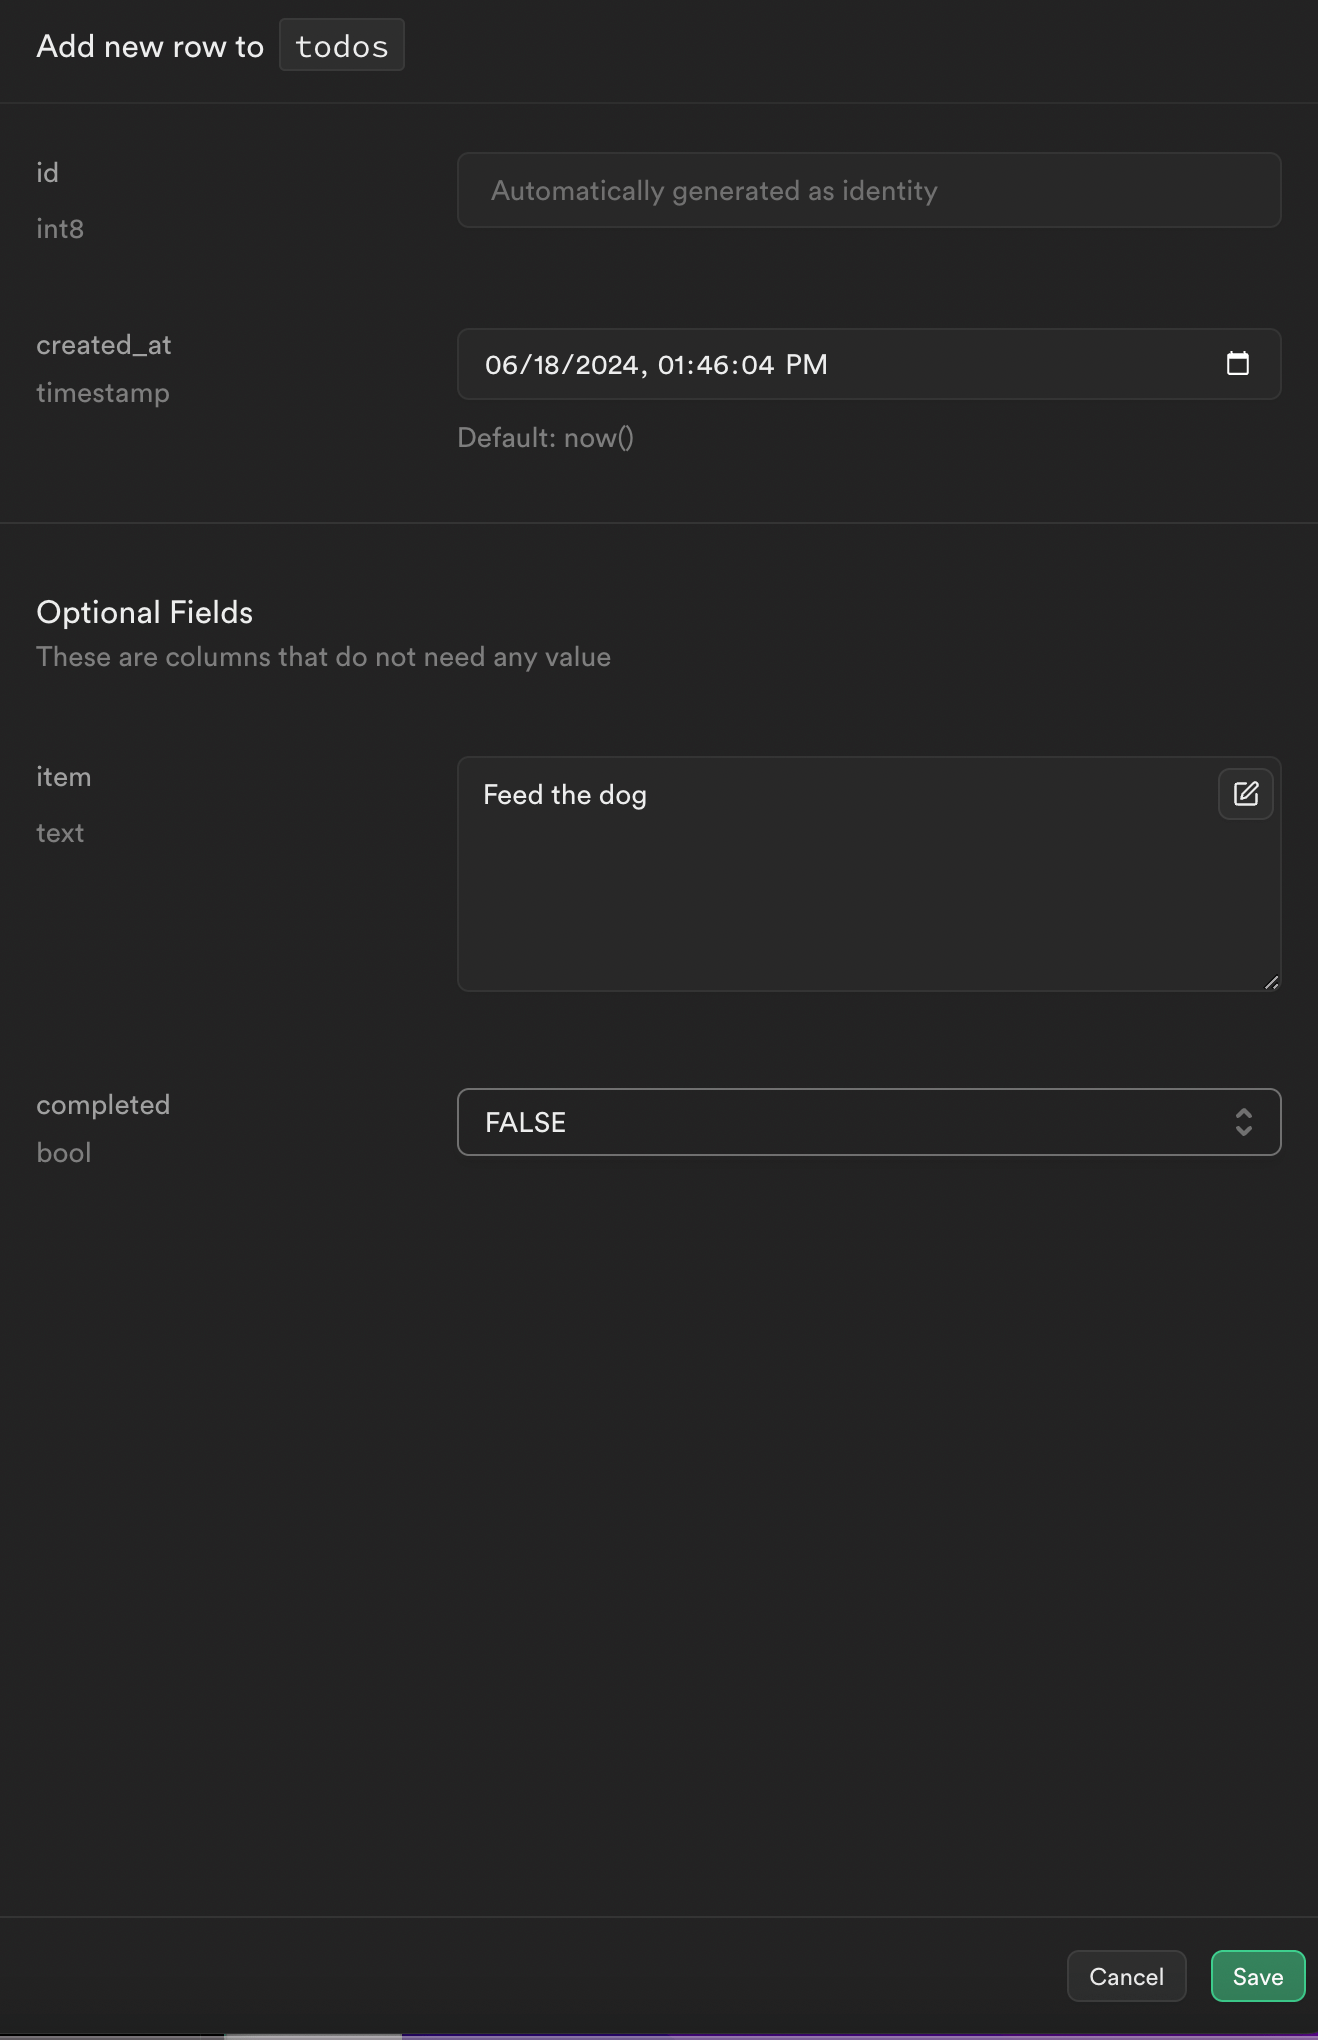
3. Insert dummy data
- Click the 'Insert' button --> Insert Row
- Add values to the columns your created
Fetch the supabase data
1. In your nuxt project create a component (ie. fetchData.vue)
<script setup>
  const supabase = useSupabaseClient();
  const {(data, error)} = await supabase
  .from("todos") / /Name of the table
  .select()
  console.log(data, error)
</script>
2. Wrap it in the useAsyncData to avoid fetching the data on both server and client side
<script setup>
    const supabase = useSupabaseClient();
    const todos = ref([])   // Initialize the todos array

 const fetchTransactions = async ()=>{

    const {data} = await useAsyncData(key:todos, async () => {
    const { data, error } = await supabase
        .from("todos")
        .select()

        if (error) return []

        return data
    })
    return data.value
    }

    todos.value = await fetchTransactions

 </script>
3. Adding and Deleting data
You can now integrate the add and delete functionalities into your Nuxt app components to manage your todo items.
Adding Data to Supabase in your Nuxt App
Create the form, schema, state and function
<UForm
  :state="state"
  :schema="schema"
  ref="form"
  @submit.prevent="save"
  class="p-4"
>
  <UFormGroup label="Todo Item" :required="true" name="item" class="mb-4">
    <UInput type="text" placeholder="Todo item" v-model.number="state.item" />
  </UFormGroup>
  <UFormGroup
    label="Transaction date"
    :required="true"
    name="created_at"
    class="mb-4"
  >
    <UInput
      type="date"
      icon="i-heroicons-calendar-days-20-solid"
      v-model="state.created_at"
    />
  </UFormGroup>
  <UFormGroup label="Completed" name="done" class="mb-4">
    <USelect :options="completed" v-model="state.done" />
  </UFormGroup>
</UForm>
<UButton
  @click="save"
  type="submit"
  color="green"
  class="w-fit"
  label="Save"
  :loading="isLoading"
/>
Import zod for validation
npm install zod
<script setup>


import { z } from "zod";

const completed=['Yes', 'No']

const supabase = useSupabaseClient();
const form = ref();

const initialState = {
  item: undefined,
  created_at: undefined,
  done: 'No',
};
const state = ref({ ...initialState });
const resetState = () => {
  Object.assign(state.value, initialState);
  form.value.clear();
};

const save = async () => {
  if (form.value.errors.length) return;
  try {
    const { error } = await supabase
      .from("todos")
      .upsert({ ...state.value });

    throw error
    }catch(e){
    console.log(e)
    }
}

const yesSchema = z.object({
  type: z.literal("Yes"),
});

const noSchema = z.object({
  type: z.literal("No"),
});

const defaultSchema = z.object({
  item: z.string(),
  created_at: z.string(),
});

const schema = z.intersection(
  z.discriminatedUnion("type", [
    yesSchema
    noSchema,
  ]),
  defaultSchema
);

</script>
Deleting data
Deleting
<script setup>
const supabase= useSupabaseClient()

const deleteTodo = async ()=>{
    try{
        await supabase.from('todos')
        .from('todos')
        .delete()
        .eq('id', todos.id )
    }catch (error){
         console.error(error)
    }
}
</script>
<template>
  <div v-for="todo in todos" :key="todo.id">
    <span>{{ todo.item }}</span>
    <button @click="deleteTodo(todo.id)">Delete</button>
  </div>
</template>
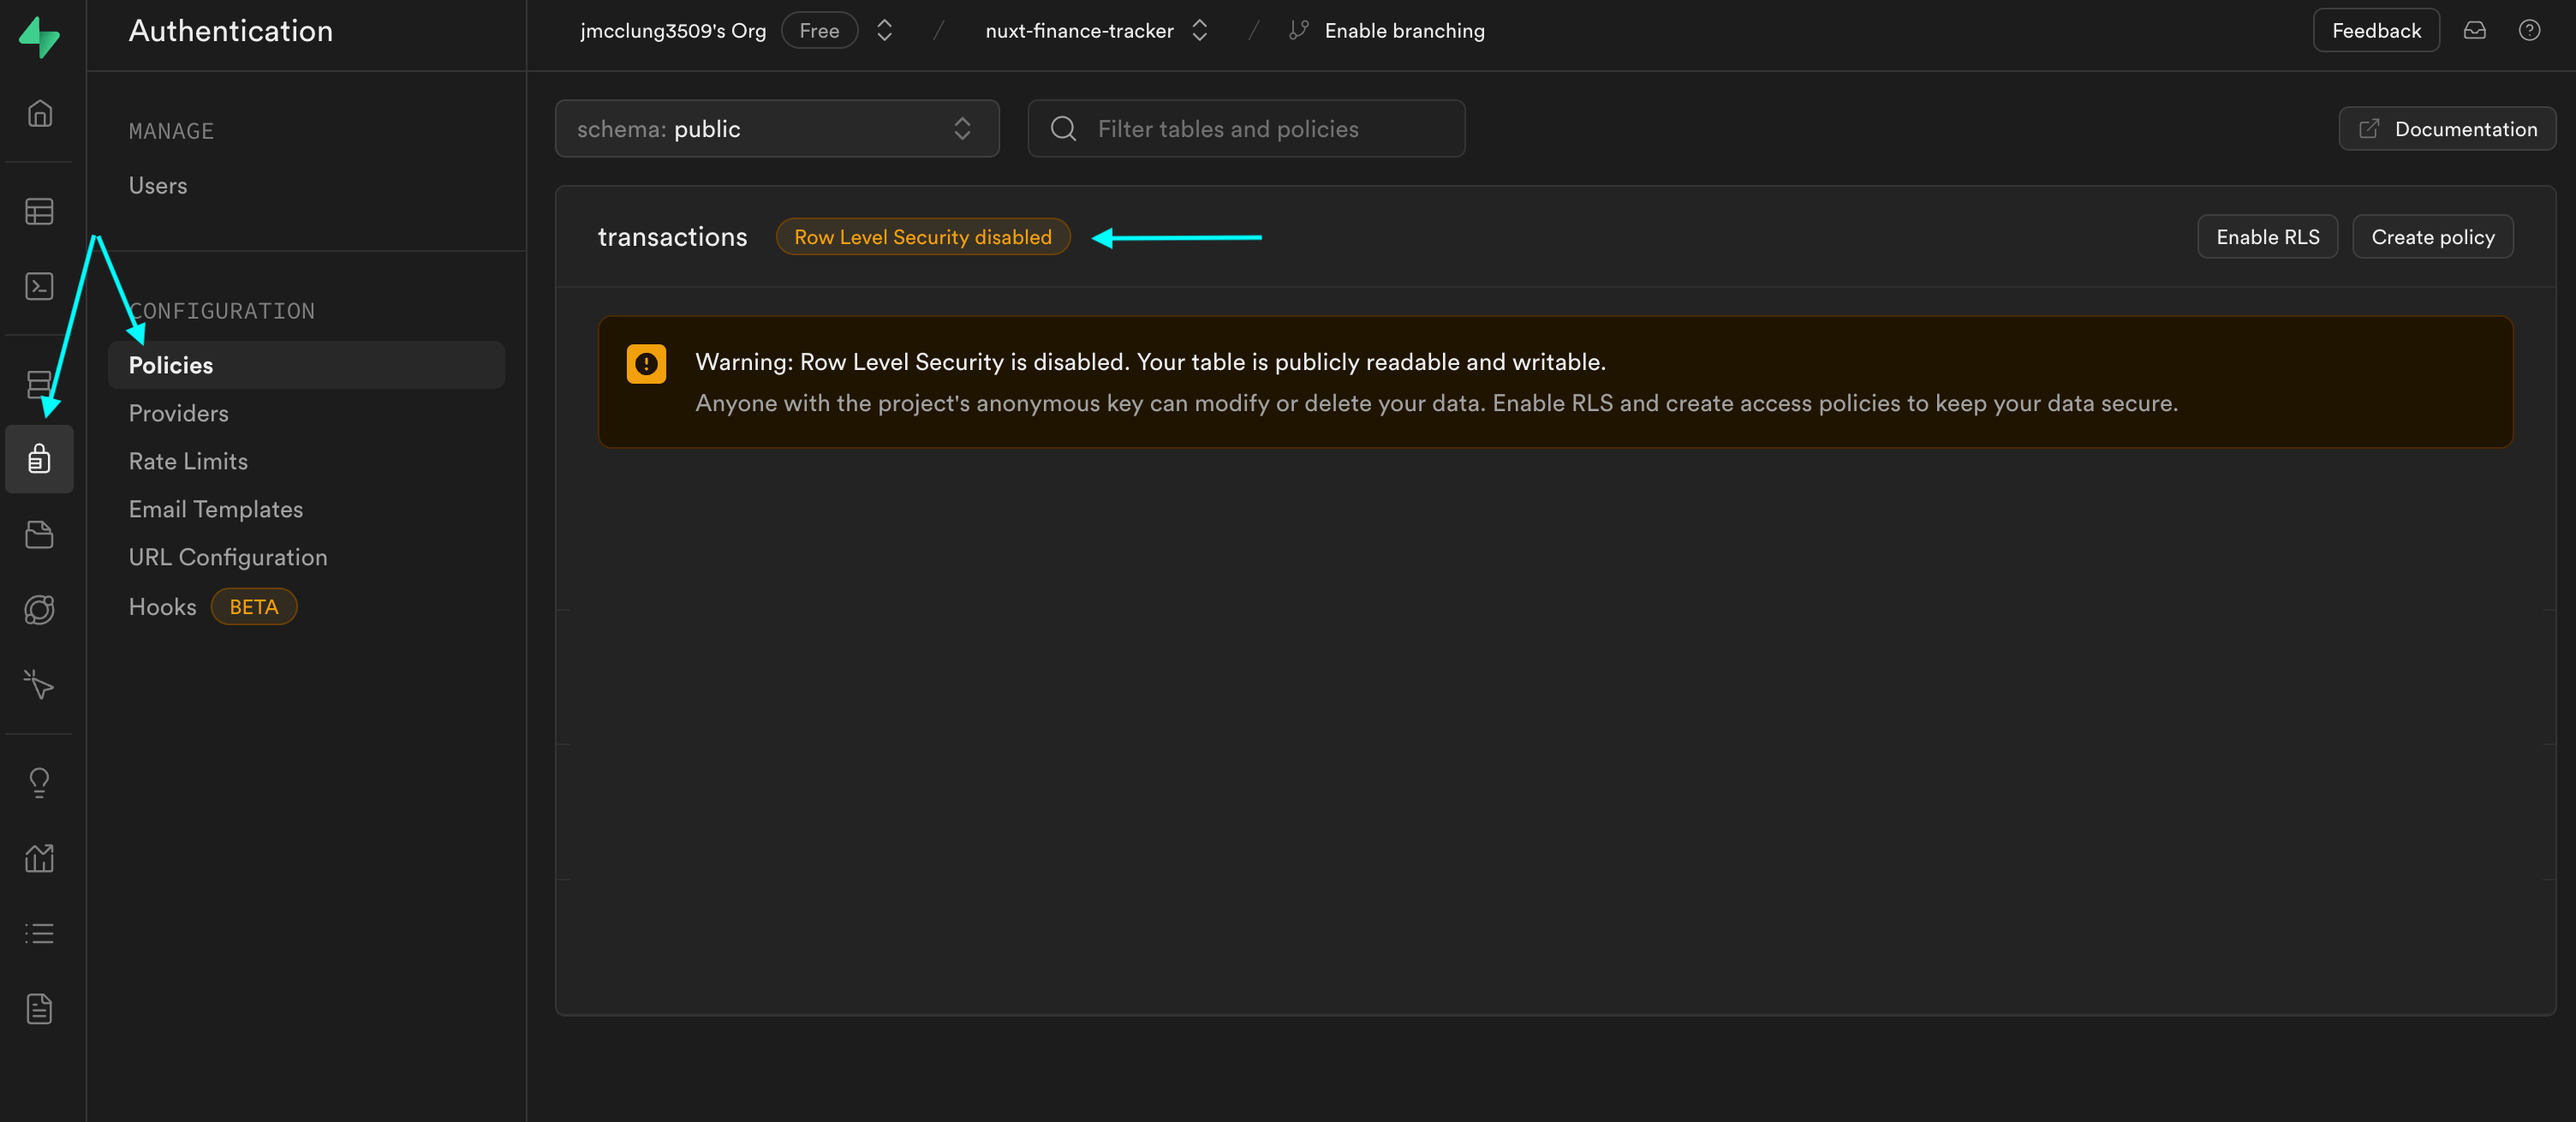
Enable Row Level Security
- From the sidebar click on Authentication
- Under configuration click on policies
- Enable Row Level Security
Conclusion
Setting up Supabase with a Nuxt app provides a robust and scalable backend solution with minimal configuration, allowing developers to focus on building features rather than managing infrastructure. By following this guide, you can quickly integrate Supabase into your Nuxt project, create and manage your database, and seamlessly fetch and manipulate data. Whether you're building a simple application or a complex system, Supabase's powerful features and Nuxt's versatility offer a streamlined development experience. Now, you're equipped to leverage these tools to their full potential and create efficient, scalable applications with ease.